

This documentation explains how to connect a Meta Pixel (formerly Facebook Pixel) to a PassPass event to track conversions, measure the return on investment of your Meta (Facebook / Instagram) campaigns, and optimize your marketing performance.
On PassPass, the Meta Pixel is configured at the level of each event. This ensures precise and independent tracking by event.
Objective of the Integration
The integration of the Meta Pixel allows you to:
measure the number of orders generated by your Meta ads
analyze the sales value from your campaigns
track page views at key stages of the purchase journey (ticketing, cart, confirmation)
Prerequisites
Before starting, make sure to:
have a Meta advertising account
have created a Meta Pixel in the Meta Events Manager
have access to the relevant event in your PassPass dashboard
If you do not yet have a Meta Pixel, you can create one via the official Meta documentation:
https://www.facebook.com/business/help/952192354843755
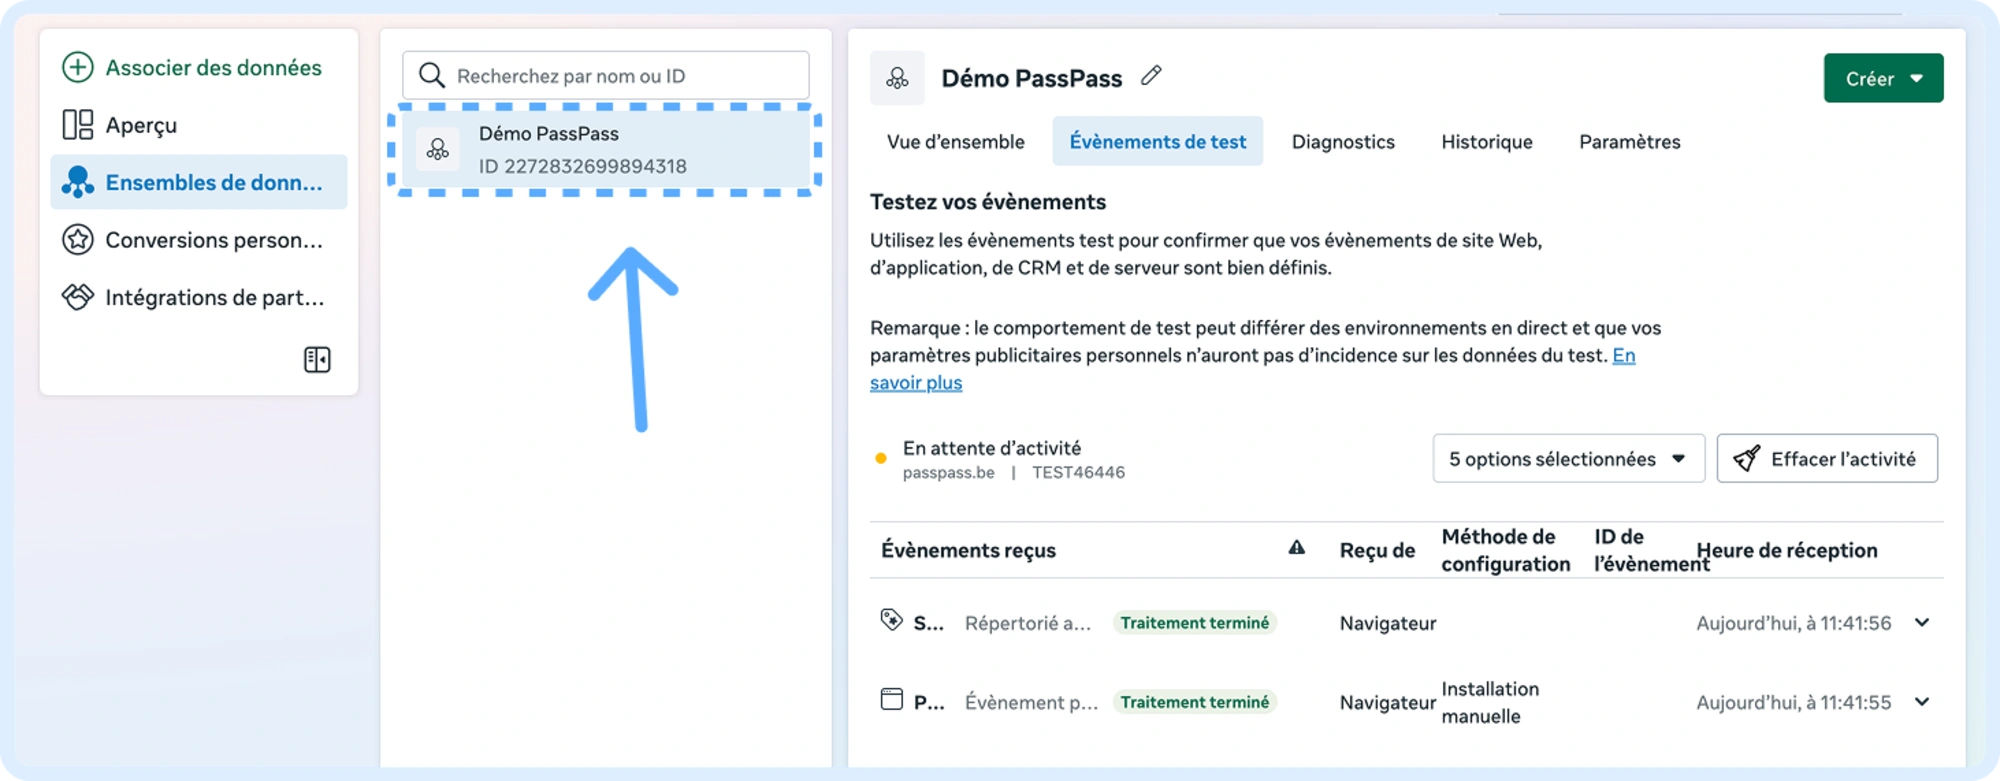
Step 1: Obtain Your Meta Pixel ID
To connect the Pixel to PassPass, you need to retrieve its identifier.
Access the Ads Manager of Meta
Go to Events Manager, then Data Sets
Select your Pixel and copy the Pixel ID (a sequence of 15 to 16 digits)
Direct access to data sets: https://business.facebook.com/settings/datasets
Step 2: Link the Meta Pixel in PassPass
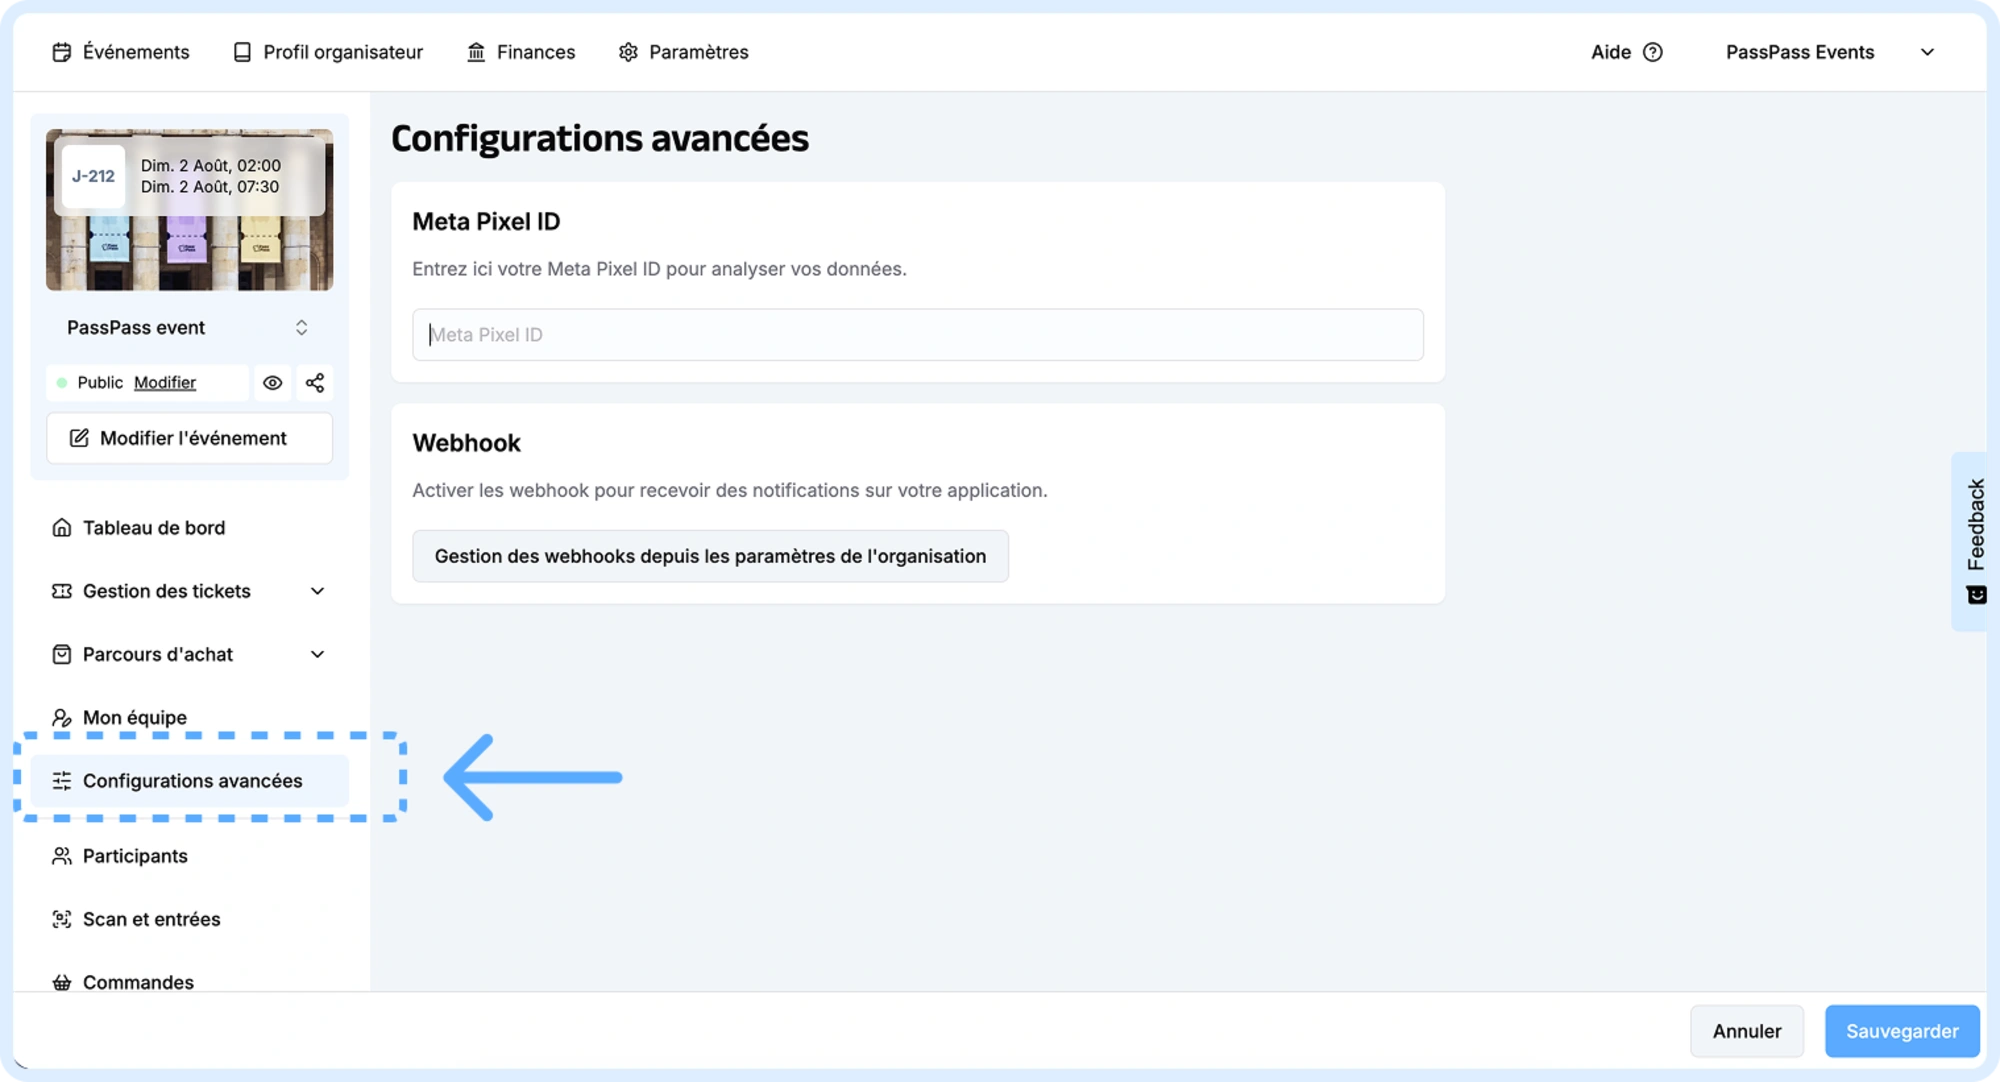
The Meta Pixel is directly linked to a specific event.
Open the relevant event in your PassPass dashboard
Access the Advanced Configurations tab in the left sidebar
Paste the Meta Pixel ID
Save
Once saved, the Meta Pixel is active and connected to this event!
Automatically Tracked Events
Once the Pixel is connected, PassPass automatically triggers the following standard Meta events:
PageView => Loading of the ticketing page
AddToCart => Adding a ticket to the cart
Purchase => Completed purchase
Verify the Integration is Working Properly
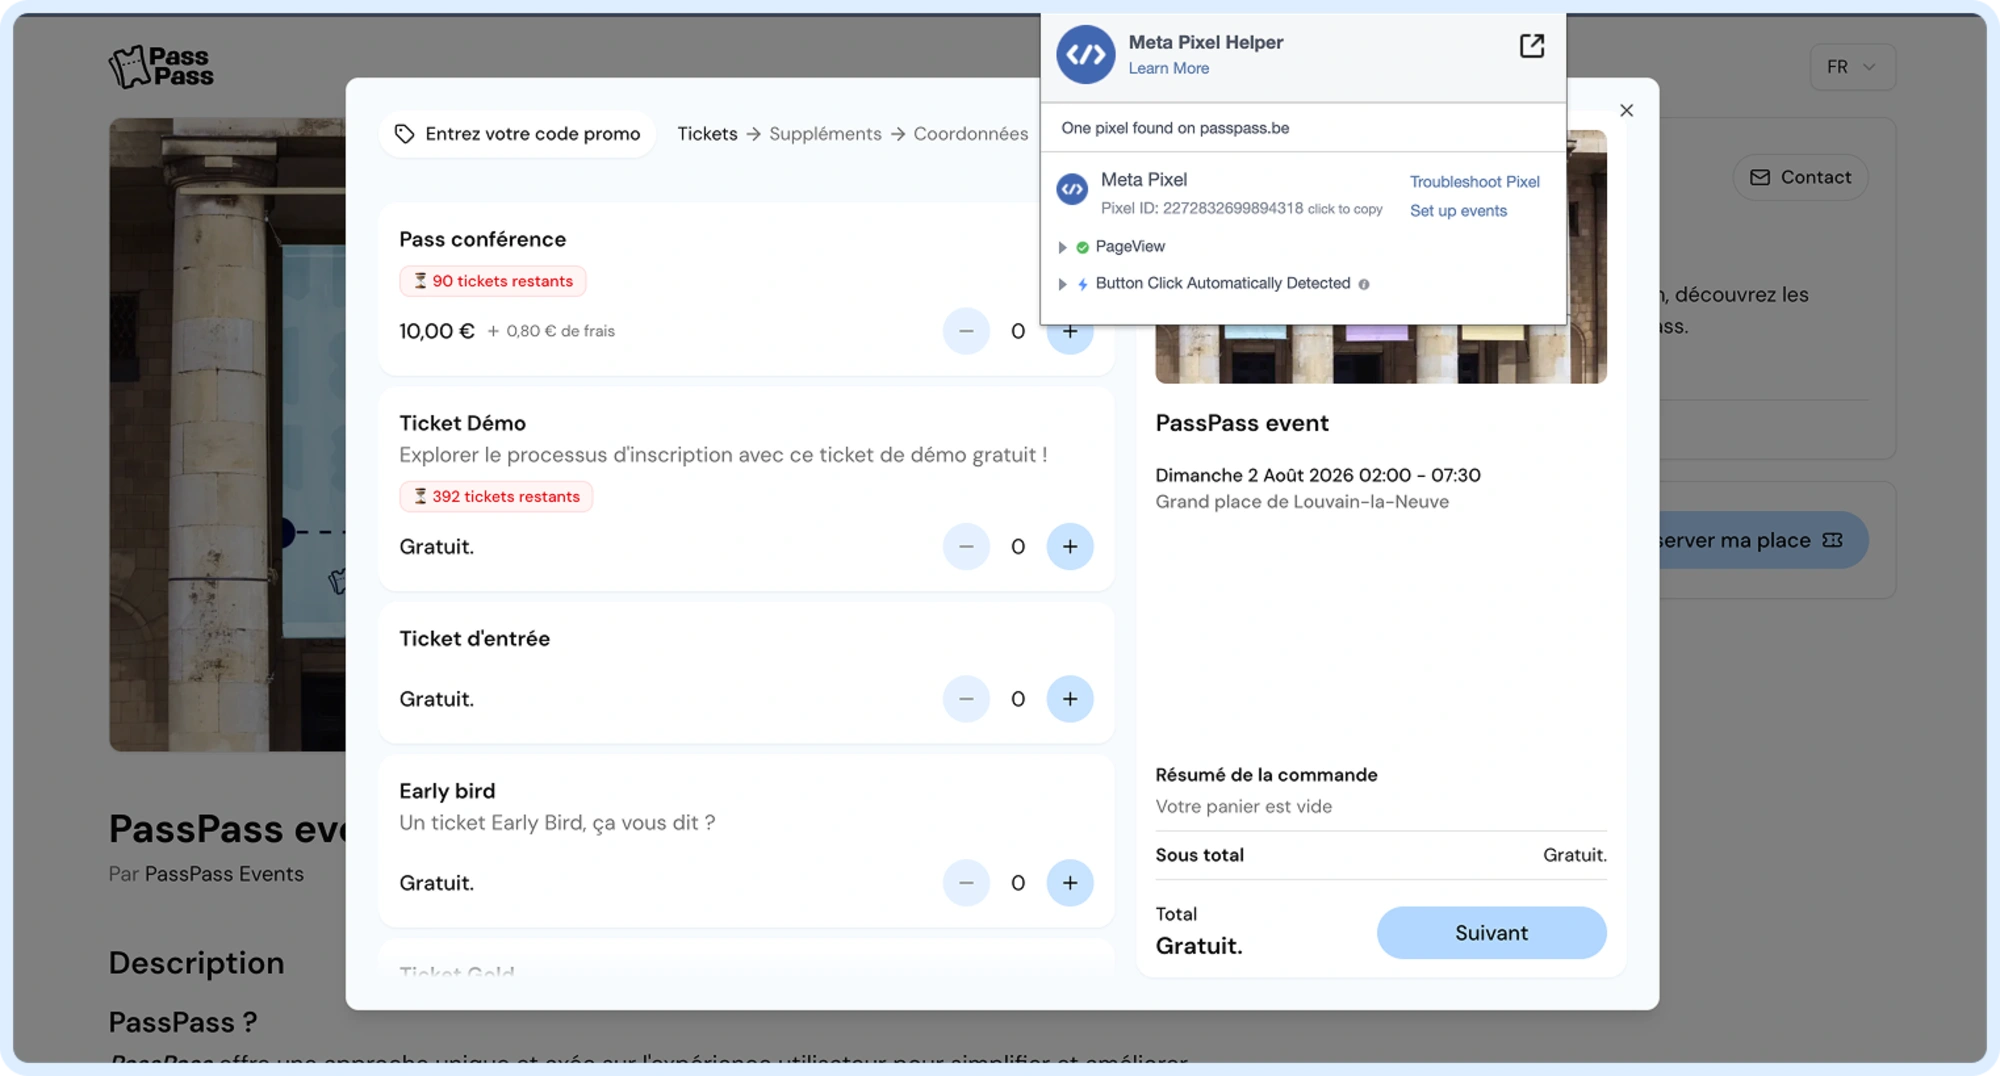
Method 1: Meta Pixel Helper Extension
Install the Meta Pixel Helper extension for Google Chrome:
Open the ticketing page of your event
Ensure that the Pixel on your PassPass event page is detected and that the ID matches the one in your Meta Events Manager
Meta documentation on Pixel Helper:
https://www.facebook.com/business/help/823677331451951
Method 2: Test Data in Meta Events Manager
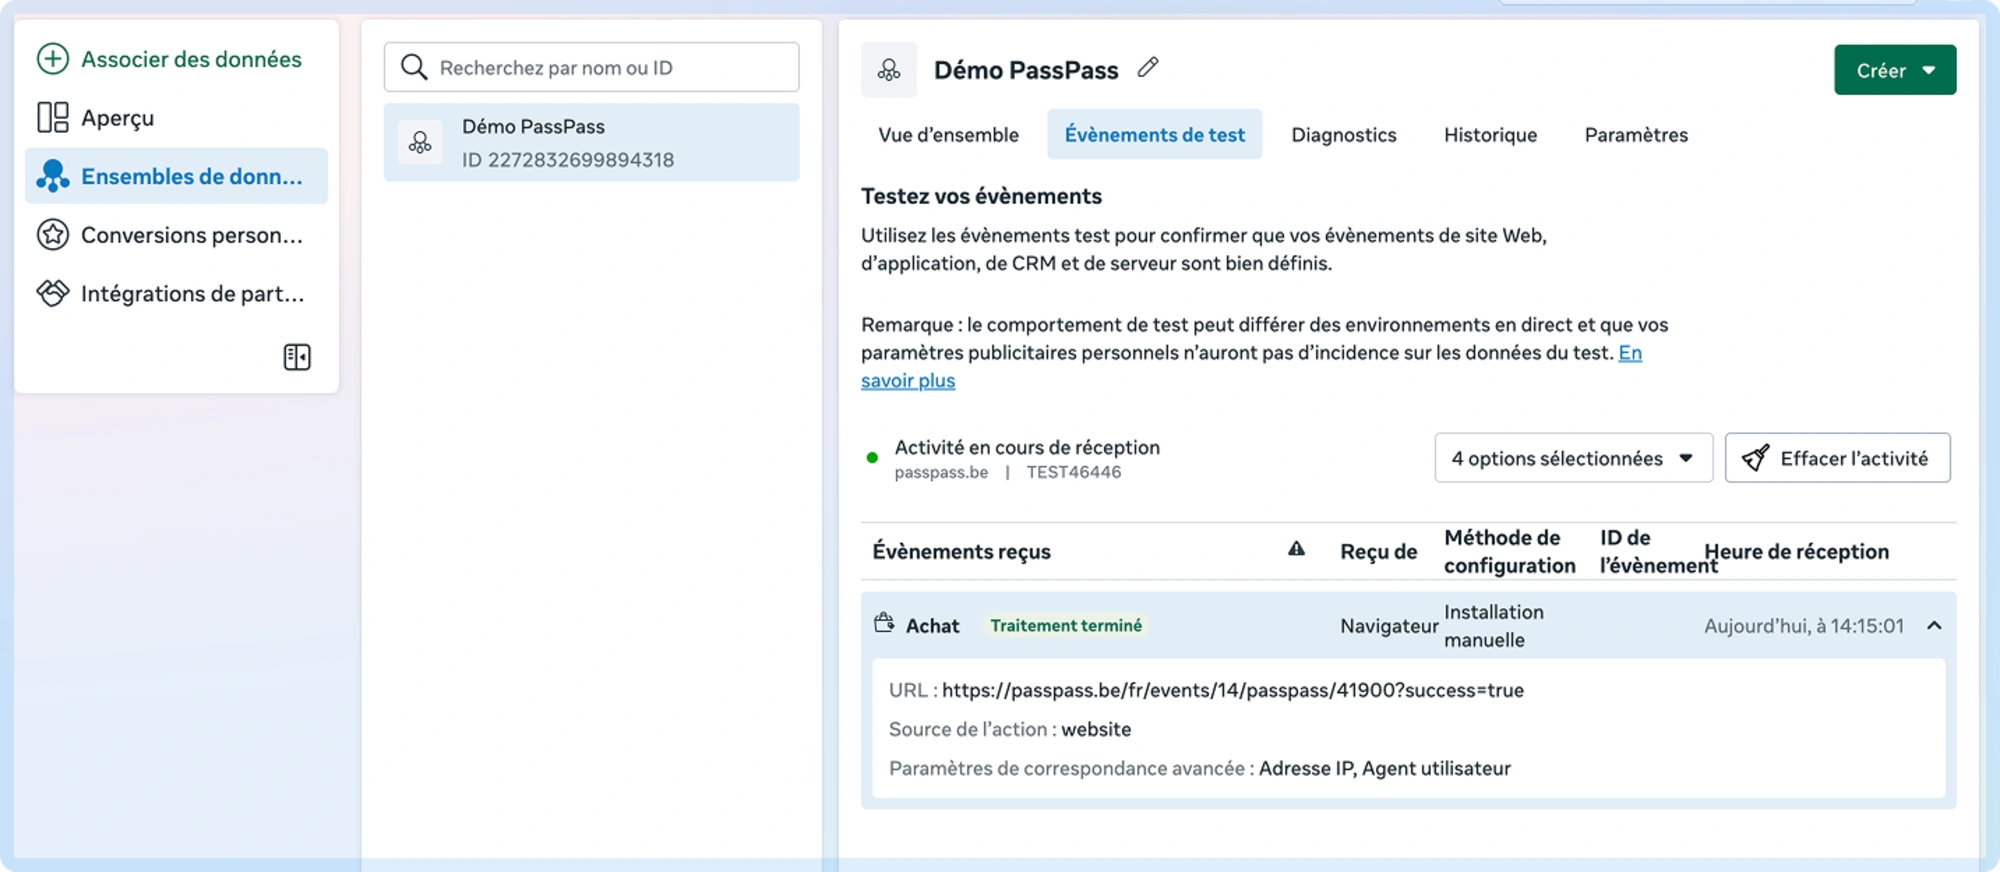
Access the Meta Events Manager
Select your Data Set
Open the Test Data
Enter the URL of the PassPass ticketing page (e.g., the registration confirmation page URL => try the complete purchase journey with a test free ticket that you can delete after your tests).
Observe the events returned in the Meta Events Manager => Test Data
Official Meta documentation:
https://www.facebook.com/business/help/2040882565969969
Important Information
The Pixel is Linked to an Event
Each Meta Pixel is associated with a specific event in PassPass.
This allows for clear performance analysis by event and prevents data mixing between multiple events.
The Meta Pixel Collects Data, It Does Not Launch Ads
The Meta Pixel only allows for data collection.
The creation of advertising campaigns, custom audiences, and conversion goals is done directly in Meta tools.
Go Further
Create custom audiences based on visitors and buyers